
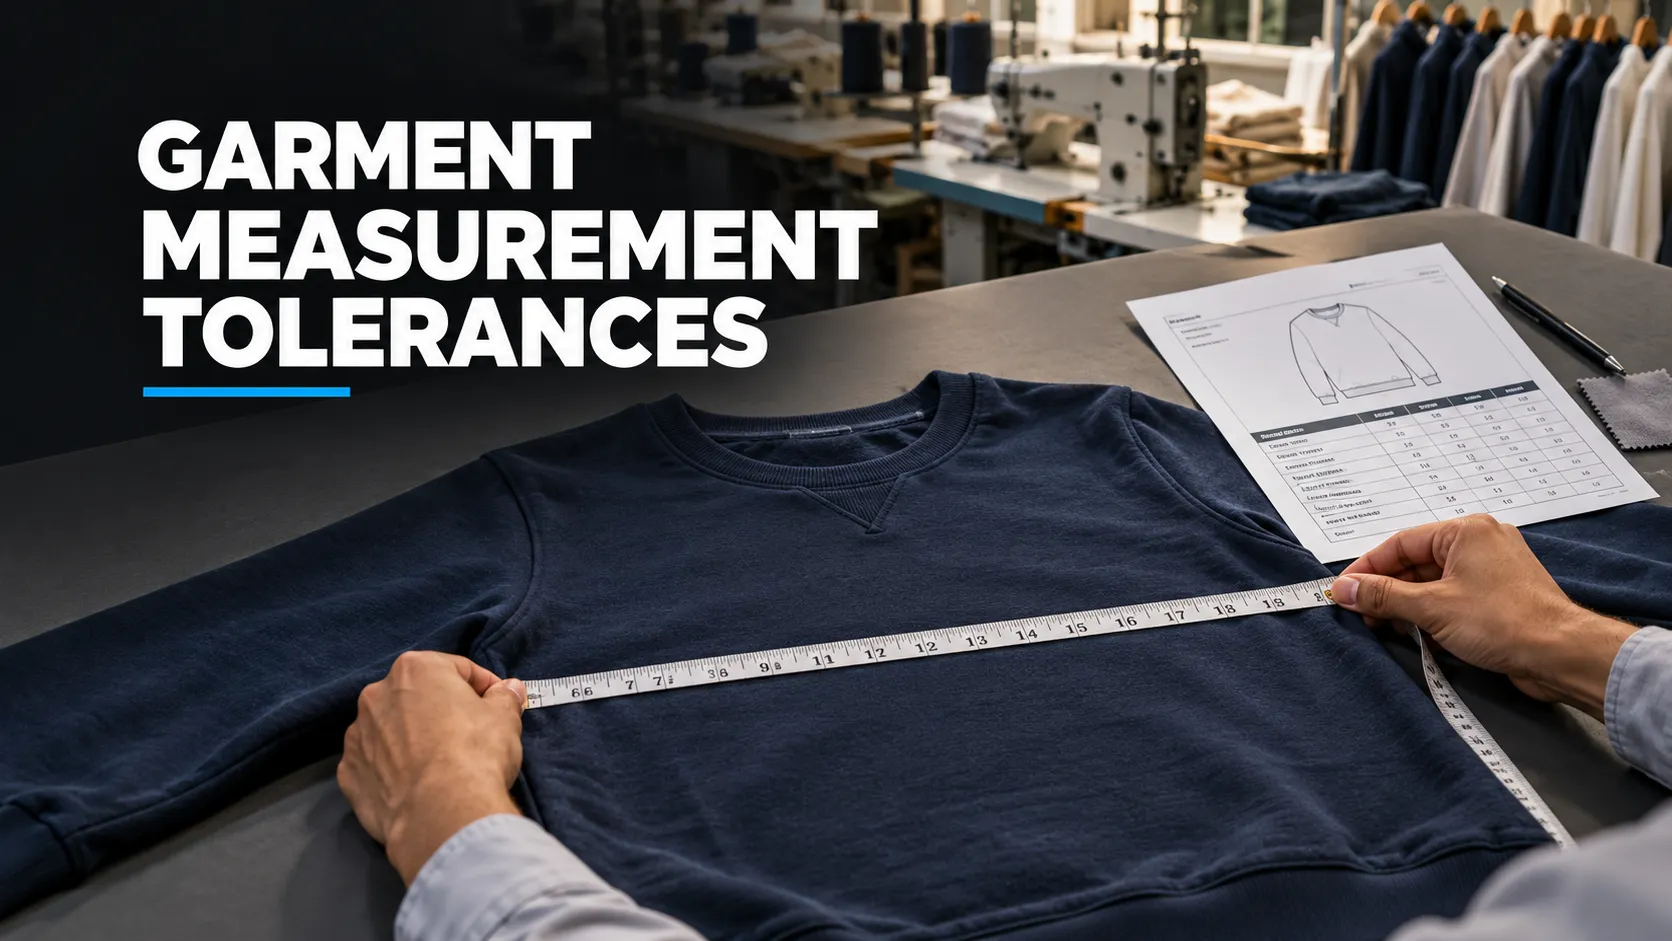
Garment measurement tolerance defines how much a finished garment’s dimensions may differ from agreed target measurements. When these limits are unclear, clothing brands and manufacturers can reach different conclusions about the same sample, creating fit disputes, repeated corrections, and delayed approvals.
A garment may appear correct during development but measure differently when reviewed by the buyer, factory, or quality assurance team. Sometimes the garment has a genuine dimensional problem. In other cases, the disagreement comes from inconsistent measuring methods, different reference points, or uncertainty about whether the garment should be measured before or after washing.
For startup clothing brands, product developers, technical designers, merchandisers, and quality teams, the solution is to establish a shared measurement system.
That system should define Points of Measure (POM), target dimensions, how-to-measure instructions, allowable tolerances, garment condition, grading rules, and measurement evidence.
This guide explains how to build that system, calculate acceptable measurement ranges, prepare garment specification sheets, account for shrinkage, and resolve measurement disagreements using documented technical standards.
These requirements form part of a complete clothing technical package. Our guide to tech pack measurements and measurement chart setup explains how measurement specifications connect with construction instructions, material details, and other manufacturing documents.
Table of Contents
What Is Garment Measurement Tolerance?
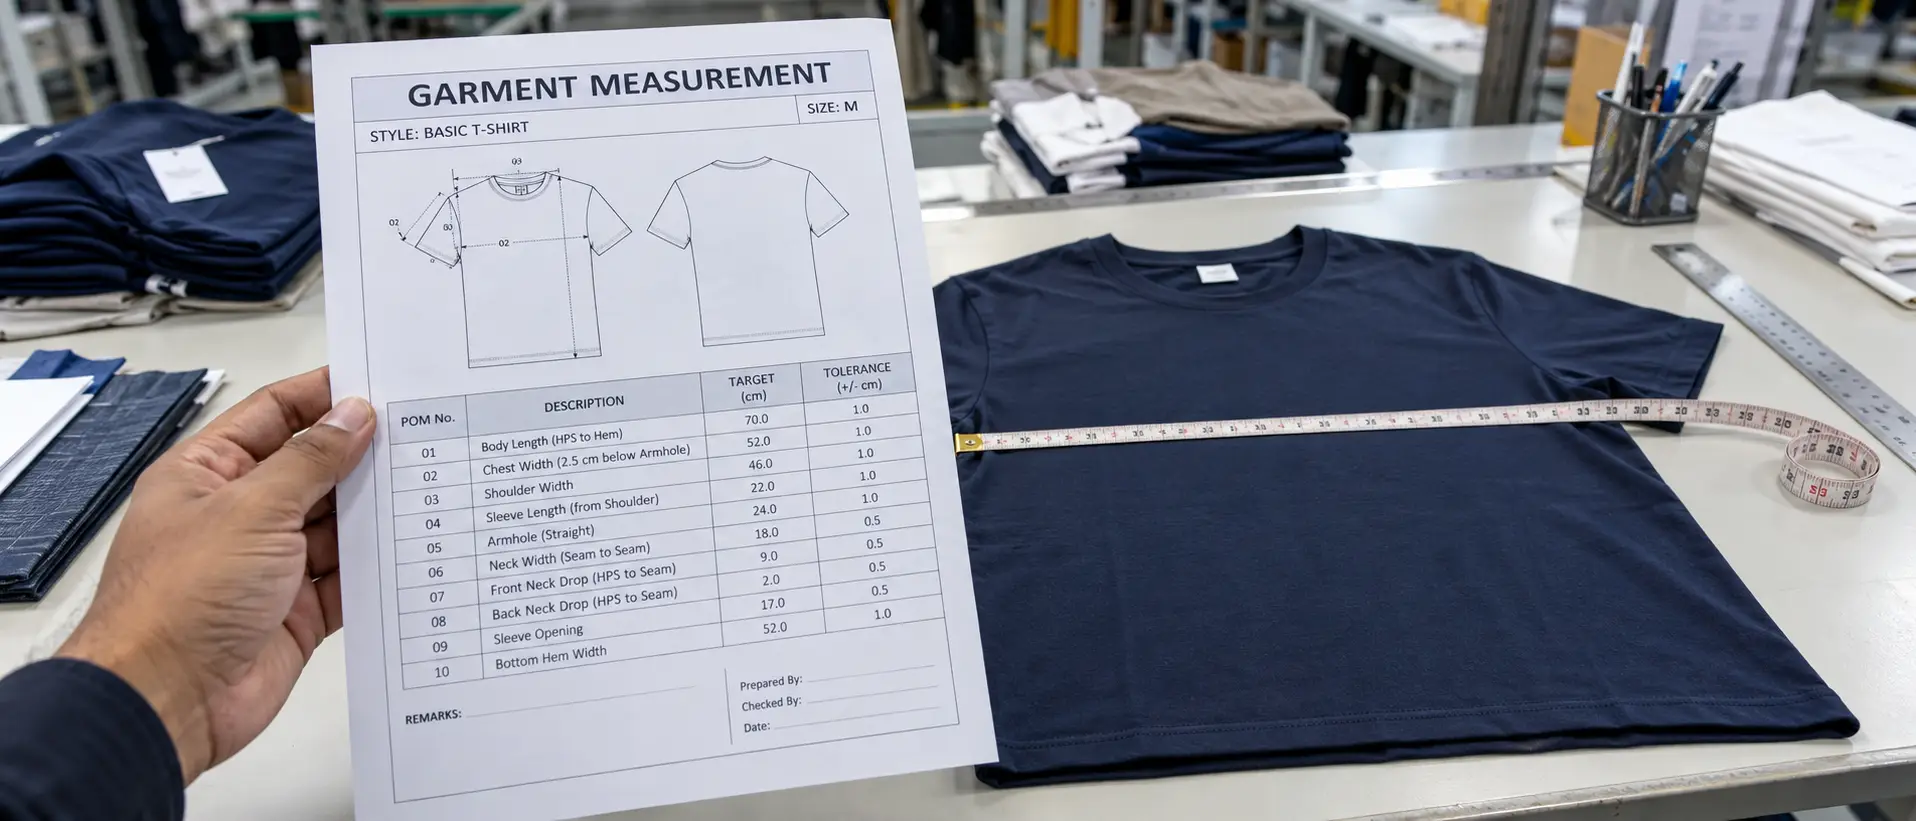
Garment measurement tolerance is the permitted variation between a specified target dimension and the actual measurement of a finished garment.
For example, a clothing brand may specify a chest width of 52 cm for a particular T-shirt size, with a tolerance of ±1 cm.
That produces the following measurement range:
- Target: 52 cm
- Lower limit: 51 cm
- Upper limit: 53 cm
A garment measuring 51.5 cm at that point falls within the specified dimensional tolerance.
A garment measuring 53.5 cm falls outside that particular range and requires evaluation according to the agreed inspection and acceptance procedure.
The tolerance is not a general guarantee that a garment will fit correctly. It is a defined dimensional limit for a particular measurement.
Why Garment Measurement Tolerances Matter
A consistent tolerance system supports several manufacturing activities.
During sampling, it provides measurable criteria for reviewing garment dimensions and identifying corrections.
During production, it helps manufacturing and quality teams monitor whether finished measurements remain within agreed limits.
During inspection, it establishes a common reference for documenting dimensional findings and applying the buyer’s acceptance requirements.
During supplier communication, it reduces disagreements caused by different interpretations of what an acceptable measurement means.
However, tolerances do not eliminate every fit problem. A garment can fall within all listed measurement limits and still have an unsatisfactory silhouette, balance, comfort level, or overall appearance.
That is why measurement compliance and physical fit assessment must be reviewed together.
Common Causes of Garment Fit Disputes
Fit and measurement disagreements frequently involve:
- The same POM being measured using different methods
- Missing or unclear reference points
- Different garment conditions during measurement
- Incorrect or inconsistent size specifications
- Tolerances that were never agreed
- Different pre-wash and post-wash expectations
- Incomplete grading instructions
- Measurements recorded against outdated technical documents
- Insufficient evidence to explain reported deviations
A reliable measurement system helps teams identify which of these conditions caused the disagreement before making corrections.
Points of Measure in Apparel: The Foundation of Measurement Accuracy
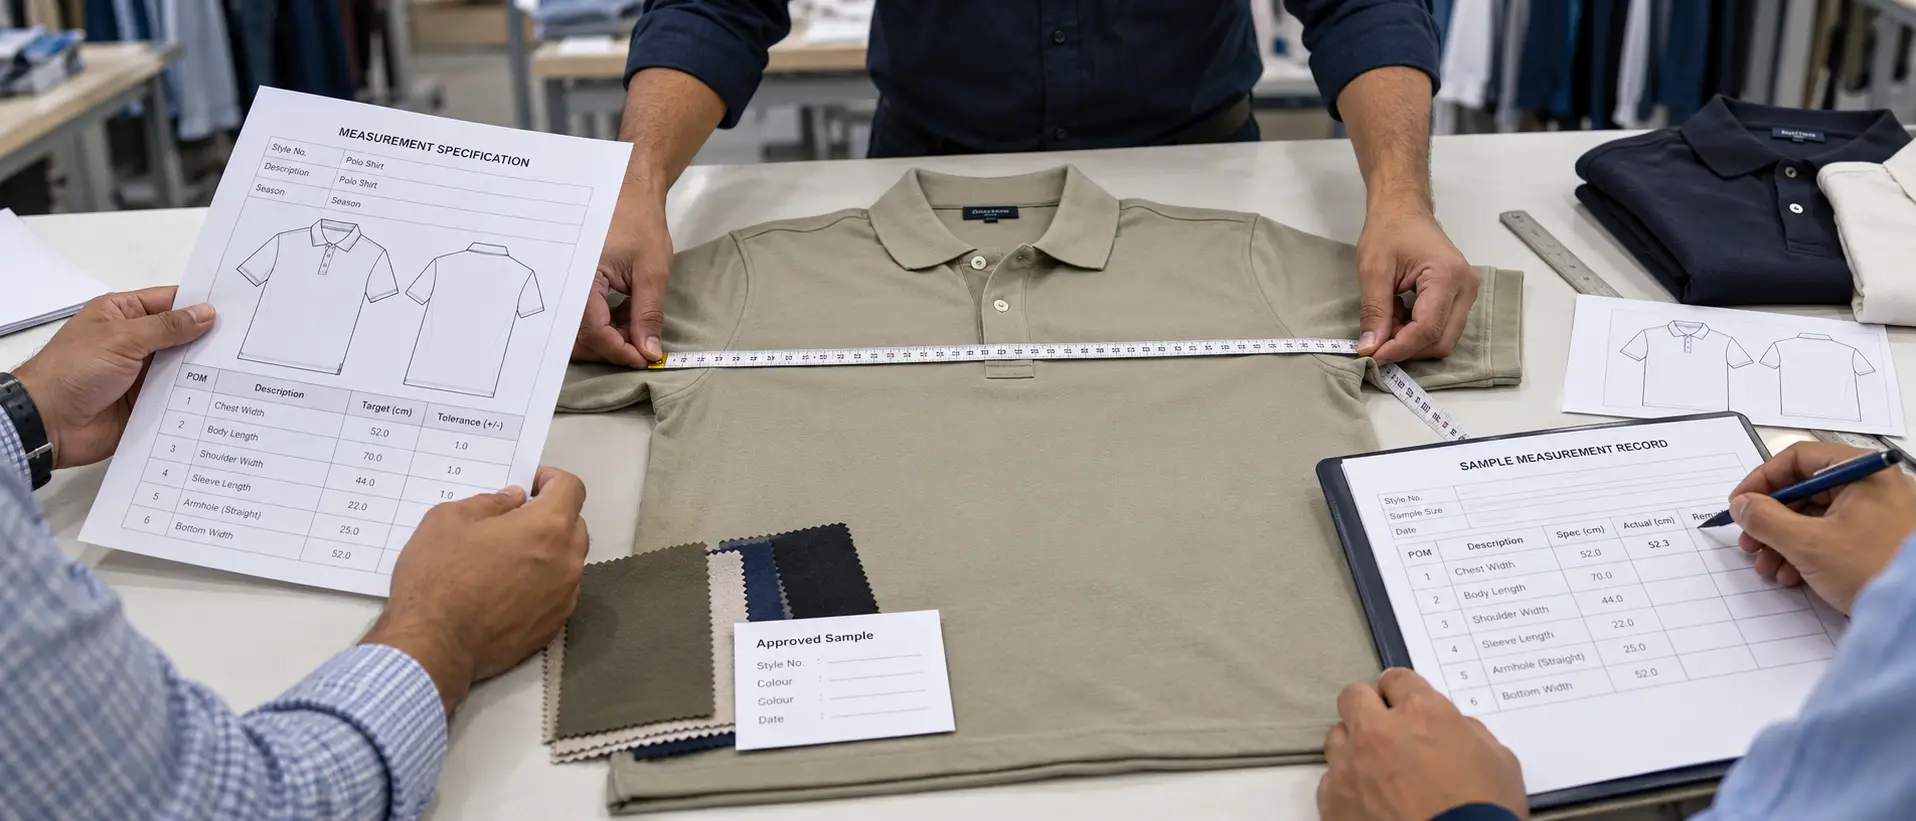
Points of Measure (POM) are defined garment dimensions used to establish technical specifications and evaluate finished measurements.
Every POM should identify what must be measured, where the measurement starts and ends, and how the measurement should be taken.
A vague POM can create uncertainty even when the target number and tolerance are clearly written.
For example, “chest width” does not establish whether the measurement is taken at the underarm, below the armhole, or at another defined position.
A more useful instruction is:
Chest width: Measure straight across the garment, 2.5 cm below the armhole, with the garment laid flat and relaxed.
This specifies the measurement location, direction, and garment condition.
Common Apparel Measurement Points
Different garment categories require different POMs.
For a basic short-sleeve T-shirt, common measurement points include:
| POM | Measurement Description | Main Purpose |
|---|---|---|
| Chest Width | Flat width at a specified distance below the armhole | Body fit |
| Body Length | From Highest Point of Shoulder to bottom hem | Overall length |
| Shoulder Width | Between defined shoulder reference points | Shoulder fit and proportion |
| Sleeve Length | From shoulder seam to sleeve hem | Sleeve proportion |
| Bottom Opening | Flat width across the garment hem | Lower-body silhouette |
| Neck Opening | Width or circumference using a specified method | Neck fit and wearability |
For trousers, the required POMs may include waist, hip, rise, inseam, thigh, knee, and leg opening.
For jackets, additional measurements may cover shoulder structure, bicep, armhole, cuff, collar, and closure-related dimensions.
The garment’s design determines which points are important.
How to Write Clear POM Definitions
A reliable POM definition should contain:
- A unique reference: Such as POM-01 or CH-01.
- A specific measurement name: Such as chest width or body length.
- Reference points: Where measurement begins and ends.
- Measurement direction: Straight, horizontal, vertical, or along a defined seam.
- Garment condition: Relaxed, stretched, fastened, or another specified state.
- Supporting instructions: Any special positioning or handling requirements.
Useful reference terms include HPS (Highest Point of Shoulder), CB (Center Back), center front, underarm seam, shoulder seam, and waistband seam.
Define these terms consistently, particularly when working with different manufacturers or technical teams.
Why Reference Points Must Remain Consistent
Consider body length measured from HPS to the bottom hem.
If one technician places the tape at the highest shoulder point while another starts from the neckline seam at a different position, their results may differ even though they are measuring the same garment.
Similarly, measuring a relaxed elastic waistband is not equivalent to measuring it under a specified extension.
These differences should be resolved through the measuring instructions rather than compensated for by increasing tolerances.
Garment Measurement Process: Aligning Brand, Manufacturer, and QA
A measurement system works best when the buyer, manufacturer, and quality team share the same technical references and understand their responsibilities.
The brand or buyer establishes the required fit direction and approved technical criteria, often with support from technical development specialists.
The manufacturer uses those specifications to develop patterns, make samples, and assess garment measurements.
Quality personnel verify relevant dimensions using the agreed instructions and report findings against the applicable standard.
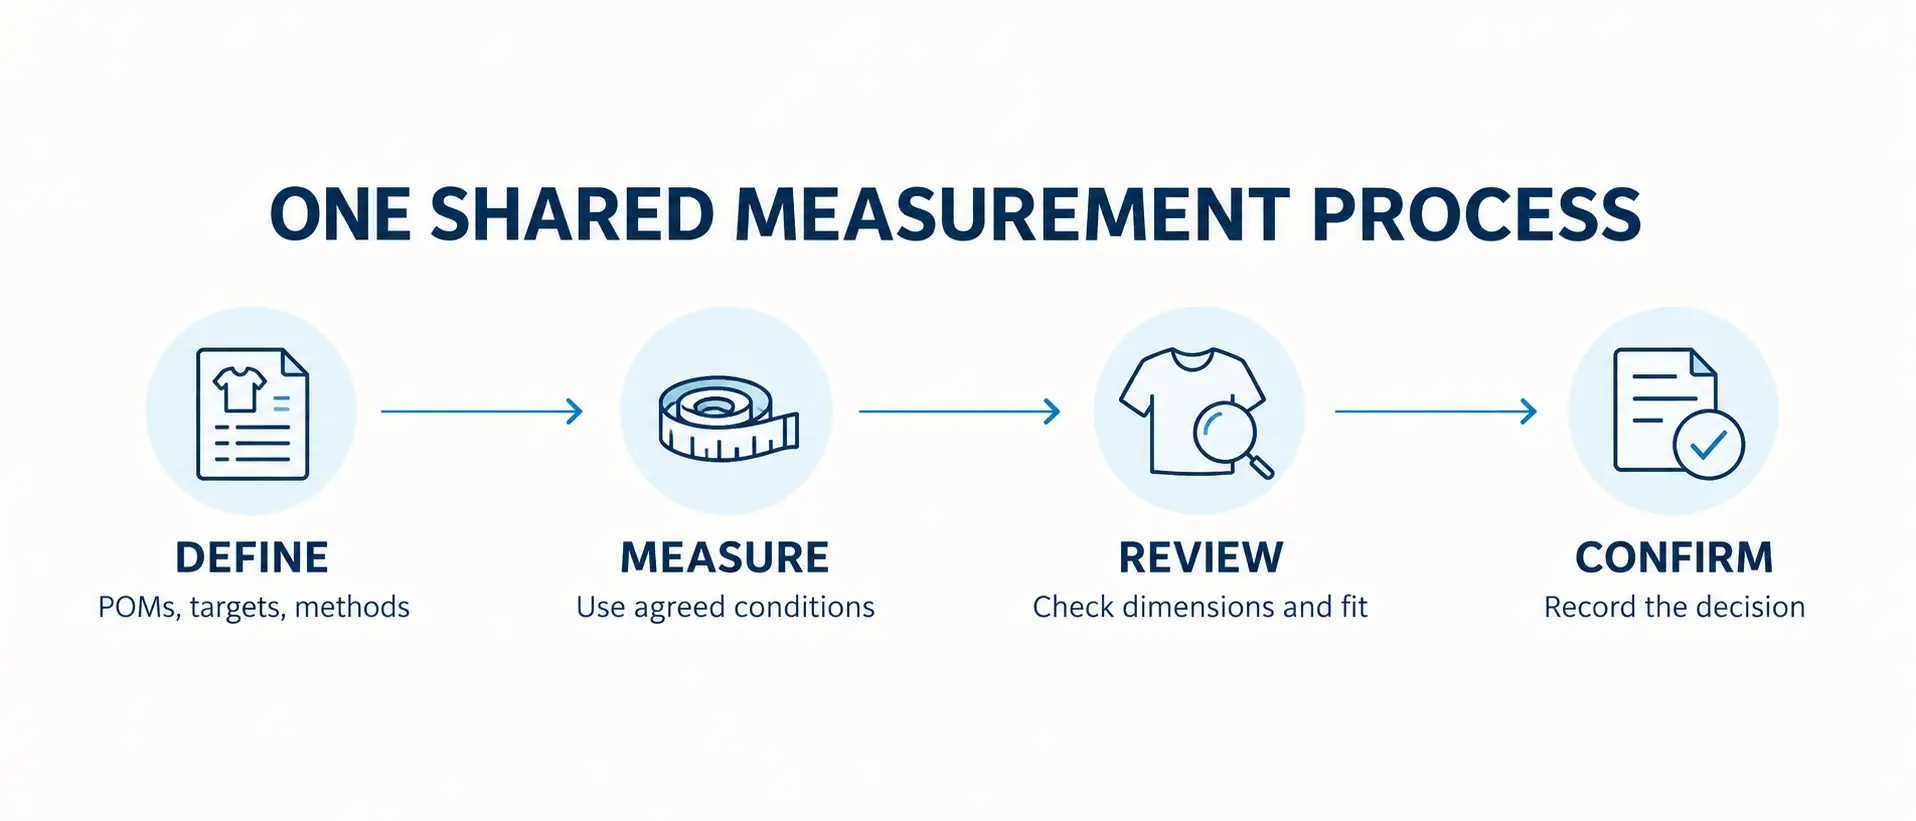
Garment Measurement Workflow
| Step | Responsibility | Main Activity | Required Record |
|---|---|---|---|
| 1. Define Specifications | Buyer / Technical Team | Establish POMs, targets, methods, and proposed tolerances | Measurement specification sheet |
| 2. Review Feasibility | Manufacturer / Technical Team | Assess fabric, construction, and measurement requirements | Technical comments and clarification log |
| 3. Measure Development Sample | Manufacturer / Sample Team | Measure relevant POMs using the agreed methods | Sample measurement report |
| 4. Review Fit and Dimensions | Buyer / Technical Team | Compare results with targets and evaluate fit | Fit comments and measurement findings |
| 5. Correct and Recheck | Manufacturer / Technical Team | Address approved corrections and verify affected POMs | Revised sample report |
| 6. Confirm Applicable Approval | Authorized Reviewer | Record the approved specifications and sample conditions | Approval record and document revision |
| 7. Verify During Production | Manufacturer QC / Assigned Inspector | Measure selected garments using the applicable inspection plan | Inspection and measurement records |
Responsibilities can vary according to the buyer’s organization, the manufacturer’s capabilities, and the agreed sourcing arrangement.
The important point is that everyone uses a consistent measurement method and understands who can authorize changes.
Keep Measurement Evidence Consistent
A useful measurement record should identify the style code, size, sample or lot reference, technical specification version, measurement date, and results.
For disputed dimensions, a photograph of the garment with the measuring tape positioned correctly may help clarify the method.
Photographs are supporting evidence, not a replacement for accurate measurements or an agreed inspection procedure.
A single person should also be responsible for consolidating technical feedback so the manufacturer does not receive conflicting correction instructions.
How to Measure a Garment Correctly
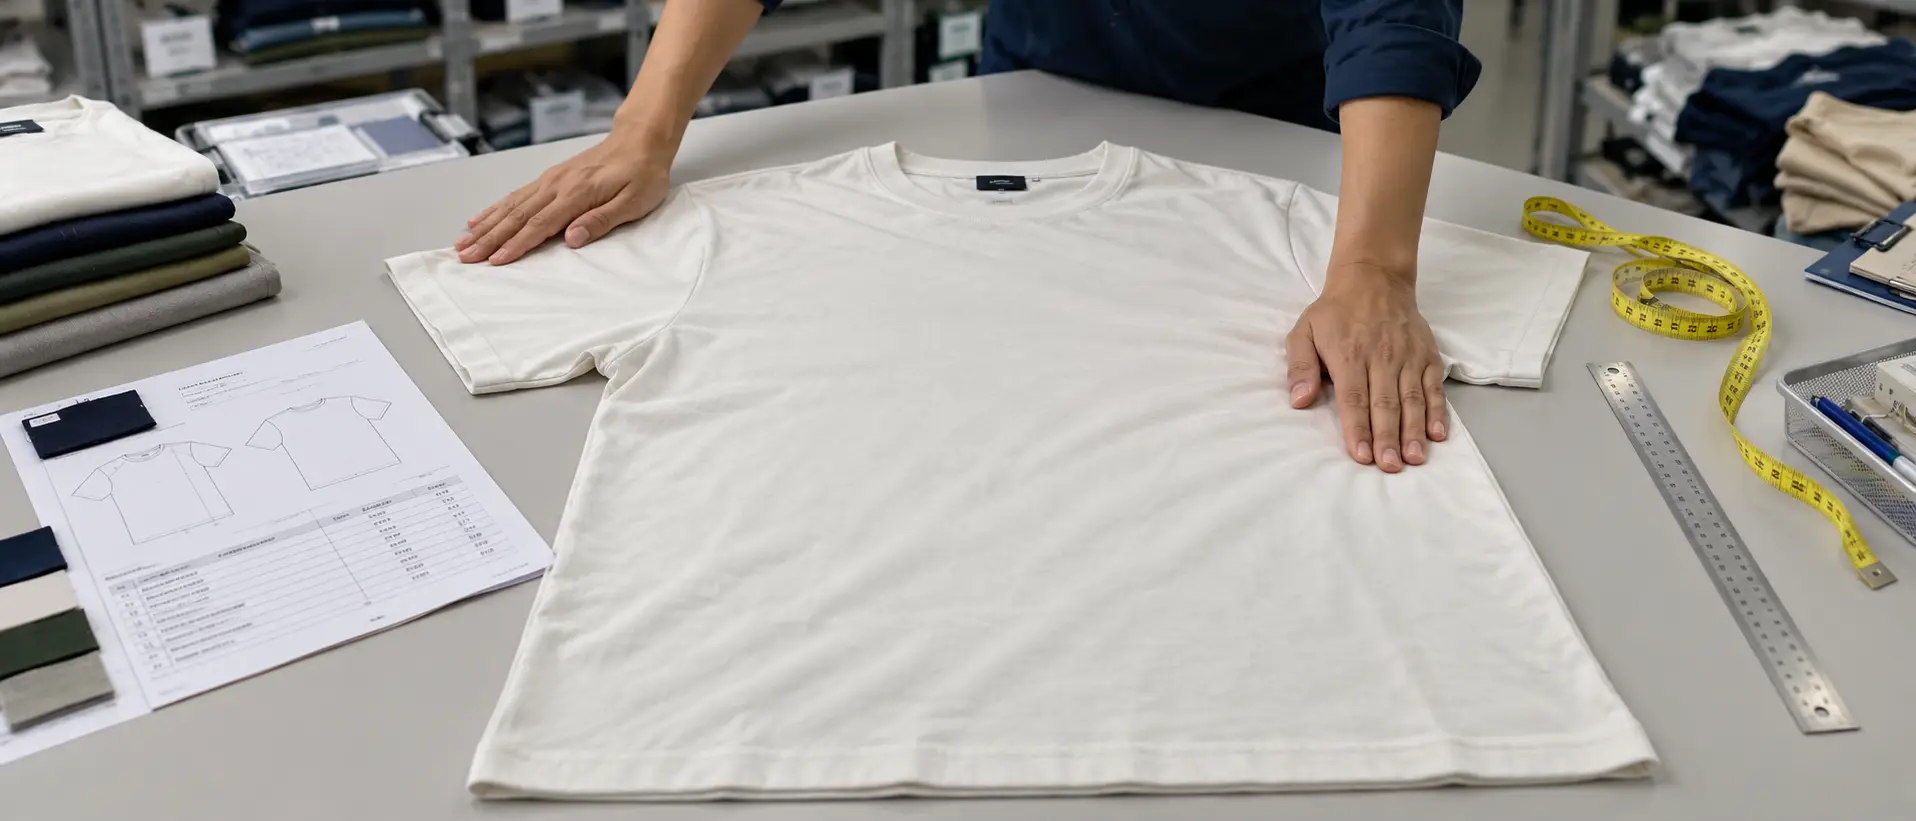
Consistent measuring practices are essential because the same garment can produce different results depending on preparation, positioning, and tape handling.
The measuring method should be appropriate to the garment and documented in its technical specifications.
Step 1: Confirm the Garment’s Measurement Condition
Before measuring, establish whether the garment should be:
- Laid flat and relaxed
- Fastened, buttoned, or zipped
- Measured before or after a specified washing process
- Conditioned or rested according to an agreed procedure
- Measured without stretching
- Measured under a defined extension, where applicable
For a typical knit T-shirt, the agreed method may involve laying the garment flat without stretching it.
For a stretch waistband, separate relaxed and extended measurements may be necessary.
Step 2: Prepare the Garment and Measuring Surface
Place the garment on a suitable flat surface.
Smooth major folds and align the garment according to the measuring guide.
Avoid pulling the material into a shape that artificially changes the dimensions unless the procedure specifically requires controlled tension.
Step 3: Identify the Correct Reference Points
Locate the specified starting and ending positions.
For chest width, use the agreed distance below the armhole.
For body length, confirm the precise HPS reference and the hem endpoint.
For sleeve length, identify whether the measurement begins at the shoulder seam, neckline, or another defined location, depending on the garment construction.
Step 4: Position the Measuring Tape Consistently
Use a suitable calibrated or verified measuring tool.
Keep the tape correctly aligned for the intended dimension. Do not follow garment curves if the specification calls for a straight-line measurement.
Avoid excessive tension, slack, or positioning that could distort the result.
Step 5: Record the Measurement
Record the result using the agreed units and precision.
For example, if the specification uses centimeters and readings to one decimal place, record measurements consistently in that format.
Do not round values in a way that changes the agreed acceptance outcome.
Step 6: Compare Against the Approved Specification
Use the relevant target, tolerance, garment condition, and document version.
If the result is outside the permitted range, verify the measuring method and investigate the deviation before determining the corrective action.
Practical How-to-Measure Checklist
- Correct garment and size identified
- Correct specification version available
- Garment prepared in the required condition
- Closures fastened where instructed
- Reference points located correctly
- Measuring tape positioned appropriately
- Stretching or tension controlled
- Results recorded using consistent units
- Actual results compared with the applicable limits
- Supporting evidence captured where required
Video: How Points of Measure and Measuring Guides Work
The following tutorial, How to Spec Your Garment with Points of Measure! by POINTS of MEASURE, demonstrates how garment POMs are defined and organized in a tech pack. It also explains how to prepare a how-to-measure guide so different teams can follow the same measurement instructions.
How to Set Garment Measurement Tolerances
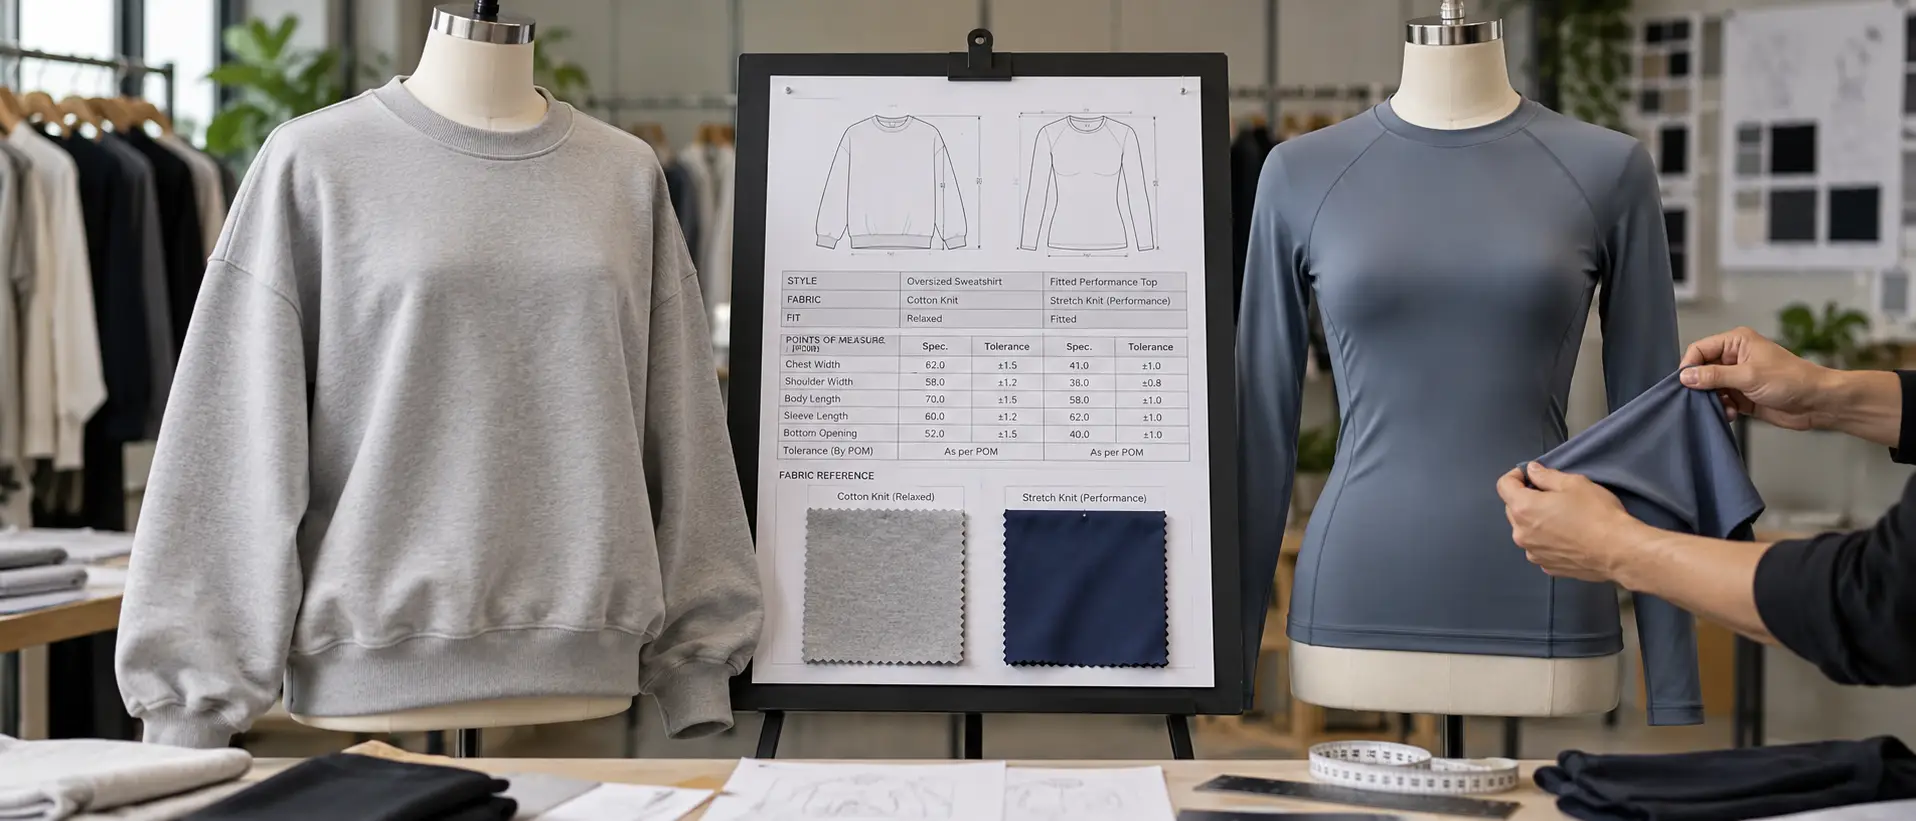
Setting tolerances requires more than assigning the same numerical allowance to every garment dimension.
The correct values depend on the garment category, fit expectations, fabric properties, construction method, production capability, and buyer requirements.
The first step is to determine how important each POM is to the garment’s intended function and appearance.
Step 1: Identify Critical Measurement Points
Some measurements have a greater effect on wearability, comfort, or product function.
Examples may include:
- Neck openings that affect dressing or comfort
- Waist openings on fitted trousers
- Sleeve and body lengths where proportion is important
- Functional openings and dimensions
- Measurements that strongly influence the intended silhouette
Criticality must be defined for the specific garment, not assigned universally based on the POM name.
For example, chest width may have different importance in an oversized sweatshirt and a close-fitting performance garment.
Step 2: Review Fabric and Construction Behavior
Fabric stretch, recovery, thickness, shrinkage, and finishing behavior can influence dimensional consistency.
Certain constructions may also produce different manufacturing variation because of seam complexity, elastic components, material handling, or finishing operations.
A tolerance policy should reflect these conditions.
However, inconsistent material or process performance should not automatically be addressed by allowing larger tolerances. Technical teams may need to improve the material specification, pattern, construction, or production process.
Step 3: Establish Proposed Tolerance Values
Define a permitted deviation for each relevant POM.
This may use a symmetrical tolerance such as ±1 cm or, where justified, an asymmetric tolerance such as +0.5 cm / -1 cm.
Terms such as tight, normal, and loose can be useful for internal risk grouping, but they do not represent universal industry measurements.
The actual numerical values should be reviewed and agreed for the garment.
Step 4: Confirm the Measurement Method and Acceptance Conditions
A tolerance has limited value if the measuring method is inconsistent.
The specification should identify garment state, reference points, measurement conditions, relevant sample or inspection requirements, and the procedure for handling deviations.
Step 5: Record Tolerances With Their POMs
Place tolerance values next to the corresponding measurements in the specification chart.
Avoid relying only on a general footer stating that all measurements have the same permitted variation, unless that rule has been deliberately approved for the relevant product.
Example Garment Measurement Tolerance Chart
The following chart uses a basic short-sleeve knit T-shirt in base size M.
| POM | Target | Tolerance | Acceptable Range | Measuring Method | Example Criticality |
|---|---|---|---|---|---|
| Chest Width | 52.0 cm | ±1.0 cm | 51.0-53.0 cm | Flat, 2.5 cm below armhole | High |
| Body Length | 70.0 cm | ±1.0 cm | 69.0-71.0 cm | HPS to bottom hem | High |
| Shoulder Width | 45.0 cm | ±0.5 cm | 44.5-45.5 cm | Between defined shoulder points | Medium |
| Sleeve Length | 22.0 cm | ±0.5 cm | 21.5-22.5 cm | Shoulder seam to sleeve hem | Medium |
| Bottom Opening | 51.0 cm | ±1.0 cm | 50.0-52.0 cm | Straight across hem, flat | Medium |
All targets, tolerances, and criticality classifications are illustrative. They are not universal apparel manufacturing standards.
The chart establishes a measurable dimensional reference, but it does not independently determine whether the garment’s complete fit or a production lot is acceptable.
How to Calculate a Measurement Deviation
Suppose a T-shirt has the following approved chest-width specification:
- Target measurement: 52.0 cm
- Tolerance: ±1.0 cm
- Acceptable range: 51.0-53.0 cm
- Actual measurement: 53.5 cm
The deviation is calculated as:
\[ 53.5 – 52.0 = +1.5\text{ cm} \]
The actual chest width is 1.5 cm above the target and 0.5 cm beyond the upper permitted limit.
The record should identify the measured deviation, confirm that the correct procedure was followed, and refer the finding for evaluation according to the agreed acceptance criteria.
A useful technical comment would be:
POM-01 Chest Width: Target 52.0 cm, actual 53.5 cm, tolerance ±1.0 cm. Result exceeds upper limit by 0.5 cm. Verify measurement method and review pattern or construction correction.
This is more actionable than stating that the sample is “too wide.”
Does Every Out-of-Tolerance Measurement Mean the Garment Must Be Rejected?
Not automatically.
An individual dimensional nonconformity should be documented and evaluated against the relevant buyer requirements, POM criticality, sample stage, inspection plan, and acceptance procedure.
A critical measurement failure may require immediate correction, while another deviation may need technical review or an agreed disposition.
The decision should not be based solely on an inspector’s personal judgment.
Similarly, measurements should not be averaged to conceal an out-of-tolerance result unless the approved inspection method explicitly calls for averaging and defines how the results are evaluated.
Shrinkage Allowance and Dimensional Stability: How Fabric Behavior Affects Measurements
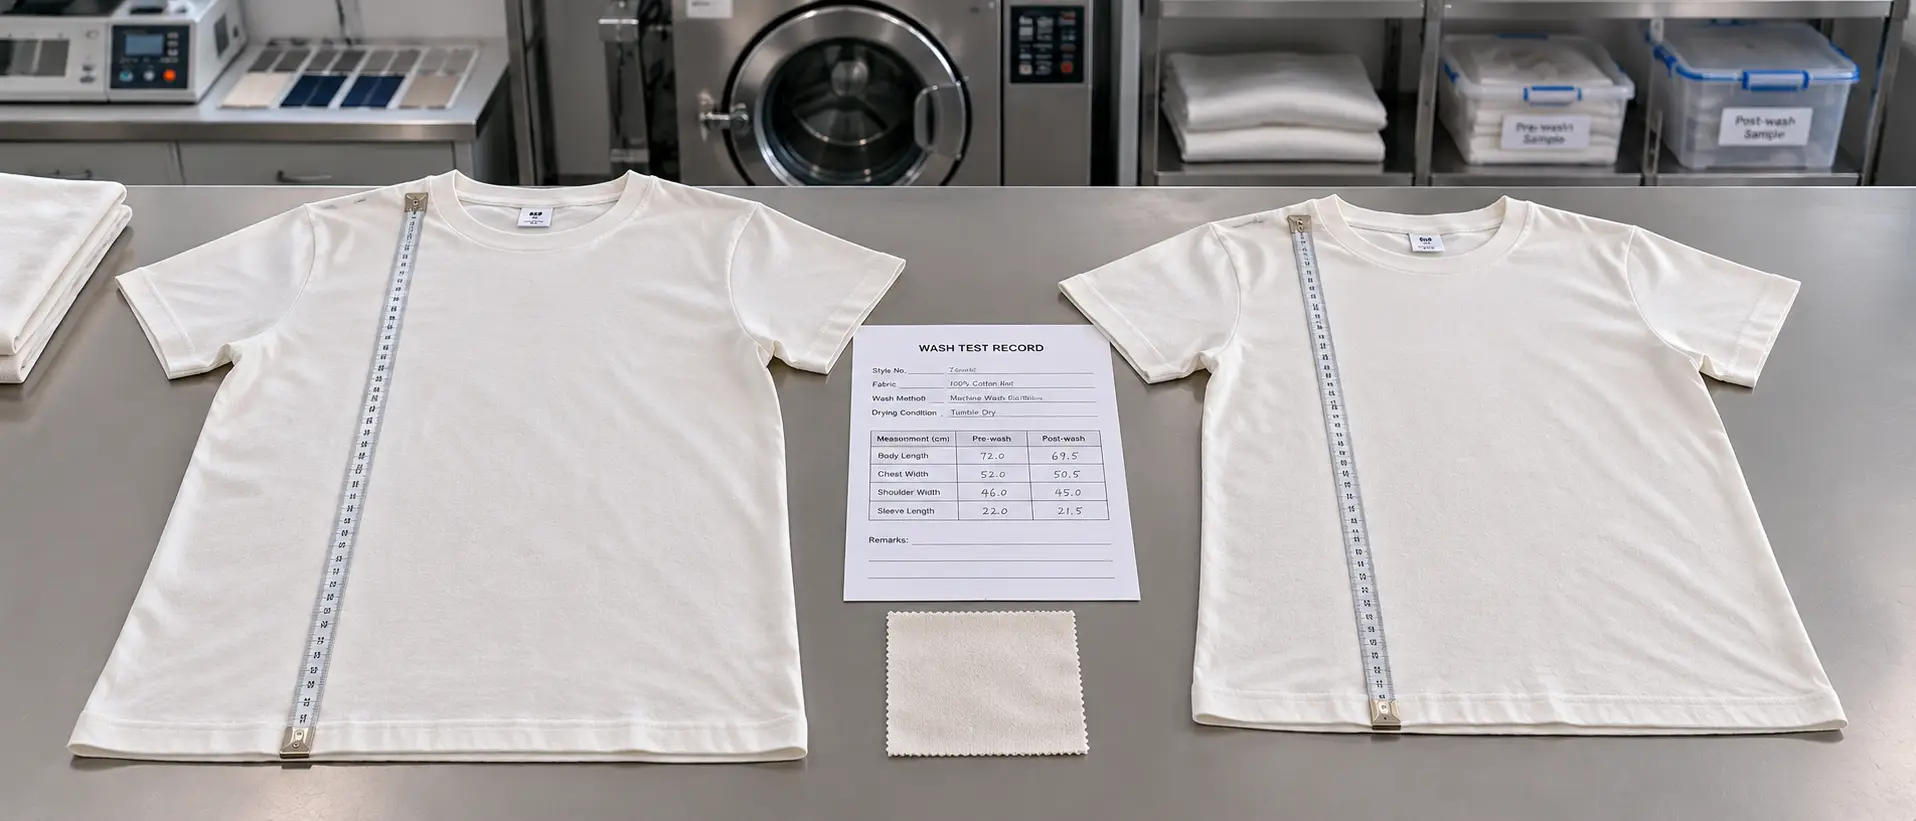
Fabric and garment dimensions can change during washing, drying, pressing, and finishing.
These changes must be considered when establishing garment measurement specifications, especially when the buyer requires dimensional stability after laundering.
However, shrinkage allowance and garment measurement tolerance are not the same thing.
A shrinkage allowance accounts for an expected dimensional change during a defined process.
A measurement tolerance defines the permitted variation around a target dimension at an agreed measurement stage.
Both must be managed, but they serve different purposes.
Pre-Wash vs. Post-Wash Measurements
The specification should identify when measurements are evaluated.
For example:
Pre-wash measurement: The garment is measured before a specified washing or finishing process.
Post-wash measurement: The garment is measured after the defined washing, drying, conditioning, or finishing procedure.
The relevant measurement state depends on the product and its approval requirements.
For washed denim, the finished garment’s dimensions may be evaluated after garment washing.
For a T-shirt, a brand may require finished garment measurements and separate dimensional-stability testing after specified laundering.
The two sets of requirements should not be confused.
How to Calculate Fabric or Garment Shrinkage
A simplified shrinkage calculation is:
\[ \text{Shrinkage (\%)} = \frac{\text{Before Wash} – \text{After Wash}} {\text{Before Wash}}\times100 \]
Suppose the body length of a test garment is:
- Before washing: 70.0 cm
- After washing: 67.9 cm
Then:
\[ \frac{70.0-67.9}{70.0}\times100=3\% \]
The garment experienced a 3% reduction in the measured length under the specified test conditions.
This does not mean 3% shrinkage is acceptable for every garment.
The acceptance requirement must be established for the product and the specified test procedure.
How Shrinkage Affects Pattern Development
If testing indicates predictable dimensional changes, the technical team may adjust pattern dimensions or finishing processes to achieve the required finished measurements.
For example, if a garment must measure 70 cm after a specified process and the expected dimensional reduction is 3%, a simplified starting calculation would be:
\[ \text{Required Pre-Process Length} = \frac{70}{1-0.03} \approx72.16\text{ cm} \]
This is only an illustrative calculation.
Actual pattern adjustments depend on fabric behavior, garment construction, processing conditions, relaxation, and development testing. Different garment dimensions may also change by different percentages.
The intended result must be verified through samples and relevant testing.
Referencing Dimensional-Change Test Methods
For assessing dimensional changes after specified washing and drying procedures, ISO 5077:2007 provides a method for determining dimensional change in fabrics, garments, and other textile articles. It does not establish a universal acceptable shrinkage percentage.
Where appropriate, related testing procedures and buyer-specific acceptance criteria should be documented in the fabric specification or testing plan.
Shrinkage and Measurement Control Checklist
- Required pre-wash or post-wash measurement state identified
- Relevant washing and drying conditions documented
- Fabric or garment dimensional-change results reviewed
- Applicable shrinkage acceptance criteria defined
- Pattern or process adjustments recorded where needed
- Finished garment measurements checked at the correct stage
- Testing and measurement references connected to the current specification
Material behavior also depends on fabric composition, construction, and finishing. A structured approach to fabric testing and dimensional stability requirements helps buyers establish appropriate testing methods, evaluate results, and define acceptance criteria before production.
Garment Spec Sheet: Documenting POMs, Tolerances, and Measuring Instructions
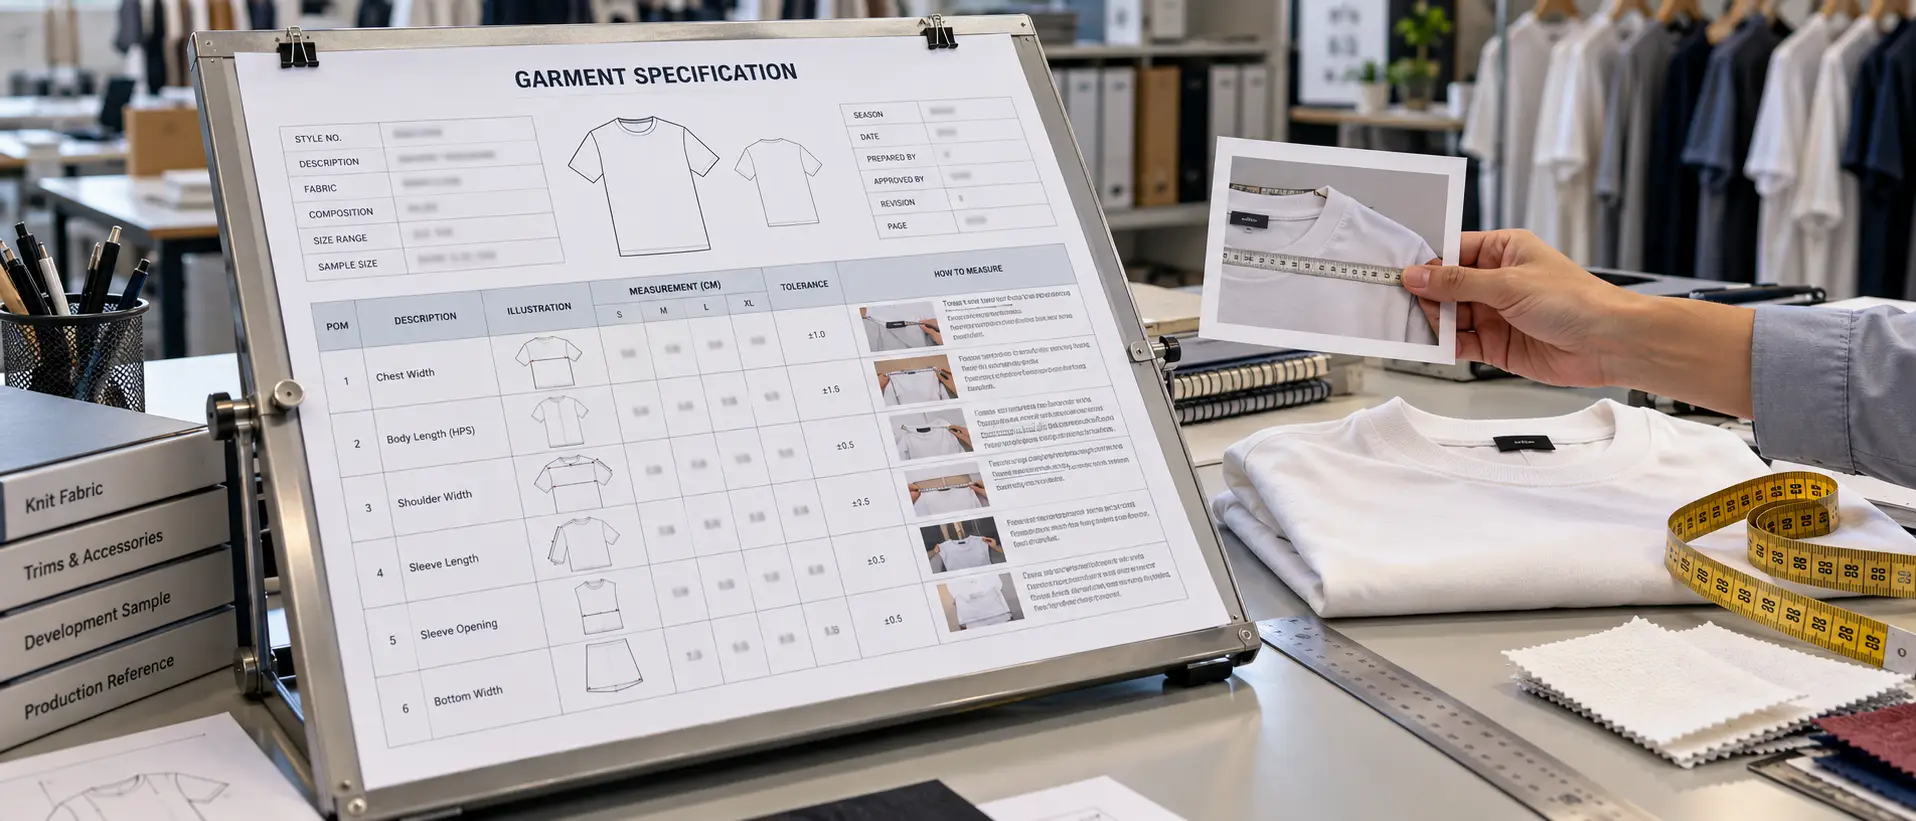
A garment specification sheet brings the required dimensions, measurement methods, and tolerances into one controlled reference.
It helps the buyer, technical team, manufacturer, and quality personnel work from consistent information.
A good specification sheet does not need unnecessary complexity. It should contain enough detail to identify the garment, define its measurements, and record relevant approvals and changes.
Essential Garment Spec Sheet Fields
| Field | Information to Include | Why It Matters |
|---|---|---|
| Style Information | Style code, garment name, and reference | Identifies the correct product |
| Version | Revision number and date | Identifies the current specifications |
| Size Range | Base size and required sizes | Establishes measurement coverage |
| POM Code | Unique reference for each measurement | Supports consistent records |
| POM Description | Exact measurement location | Reduces interpretation |
| Target Measurement | Required dimension for each size | Establishes the technical target |
| Tolerance | Permitted variation | Defines dimensional limits |
| Measuring Method | Garment condition and reference points | Supports consistent measurements |
| Criticality | Relevant measurement priority | Guides technical evaluation |
| Approval Status | Provisional, reviewed, or approved | Identifies specification readiness |
Additional fields may include actual sample measurements, reviewer comments, inspection references, and revision history.
Include a How-to-Measure Guide
Written instructions should be supported by technical drawings or photographs when necessary.
For example, a chest-width illustration can show the precise tape position and distance below the armhole.
A waistband guide can demonstrate relaxed and extended measurement conditions.
For unusual garment construction, additional measuring instructions may be needed to prevent different interpretations.
Maintain a Controlled Measurement Sheet
A sample measurement record should identify:
- Style code and garment size
- Current specification version
- Sample identification
- Date of measurement
- Measurement personnel or responsible team
- Actual measurements
- Deviations from target
- Findings and required actions
This allows the team to compare measurements across sampling rounds without losing the history of corrections.
For buyers preparing technical documents before approaching manufacturers, our tech pack checklist for quotation and sampling helps distinguish essential development requirements from information that may remain provisional at earlier stages.
Need Help Preparing Accurate Garment Specifications?
Share your measurement charts, garment specifications, or available tech pack documents with RYZEAL SOURCING to discuss technical preparation, quotation requirements, and sampling through our manufacturing partner network.
Apparel Grading Rules: Maintaining Fit Across Different Sizes
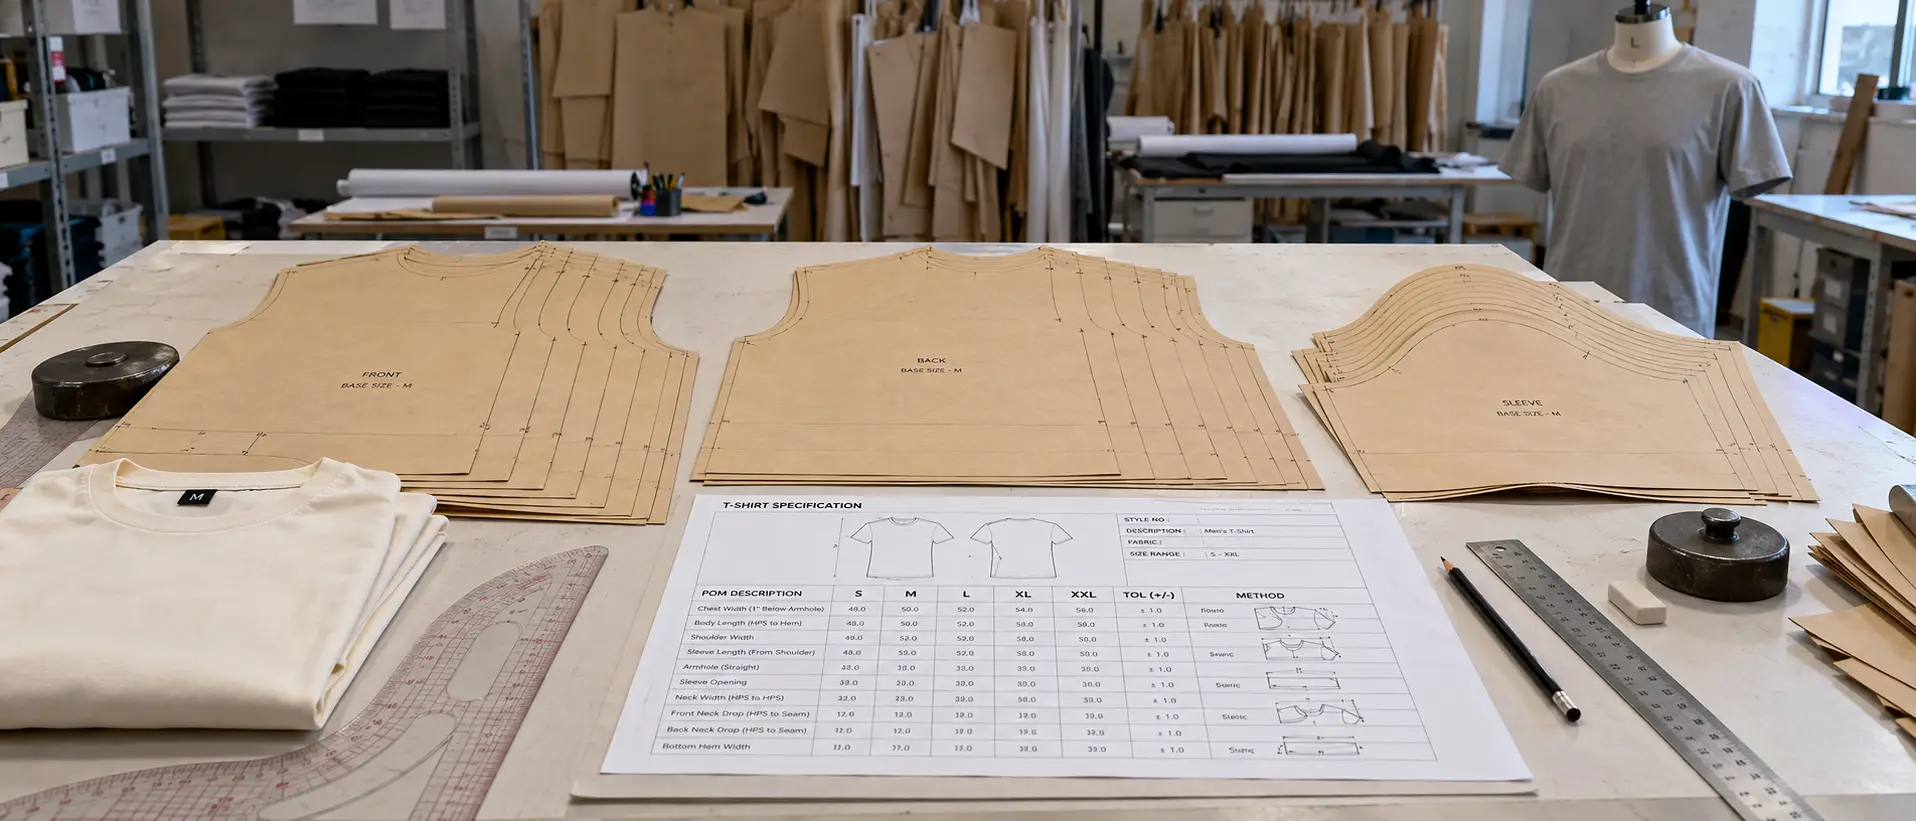
Apparel grading is the process of developing different pattern sizes from an established base pattern according to defined size relationships.
Grading rules influence how garment dimensions change across the size range.
A successful base-size fit does not automatically guarantee suitable proportions in smaller or larger sizes.
That is why brands should review their grading logic and, where necessary, evaluate physical samples across the intended size range.
How Grading Relates to Measurement Tolerance
A grading rule determines the target measurement for another size.
A tolerance determines the permitted variation around that size’s approved target.
These are separate specifications.
For example, a T-shirt may have:
- Size M chest-width target: 52 cm
- Size L chest-width target: 54 cm
- Chest-width tolerance: ±1 cm for both sizes, if approved
The 2 cm difference between the target sizes is the grade increment.
The ±1 cm allowance is the measurement tolerance.
The two should not be used interchangeably.
Example Graded Measurement Chart
The following example illustrates a simple grading structure for a short-sleeve T-shirt.
| POM | Size S | Size M (Base) | Size L | Size XL | Example Grade per Size |
|---|---|---|---|---|---|
| Chest Width | 50 cm | 52 cm | 54 cm | 56 cm | +2 cm |
| Body Length | 68 cm | 70 cm | 72 cm | 74 cm | +2 cm |
| Shoulder Width | 44 cm | 45 cm | 46 cm | 47 cm | +1 cm |
| Sleeve Length | 21 cm | 22 cm | 23 cm | 24 cm | +1 cm |
| Bottom Opening | 49 cm | 51 cm | 53 cm | 55 cm | +2 cm |
Illustrative grading example only. Actual size increments must be developed for the garment’s intended fit, customer measurements, pattern structure, and size range.
Do All POMs Use the Same Grade Increment?
No.
Different garment dimensions may require different grading relationships.
Chest width, shoulder width, sleeve length, neck opening, and body length do not necessarily increase at the same rate.
For example, a garment might require a larger grade increment for body circumference than for neck width.
The relationship also depends on the garment category and intended silhouette.
A fitted woven blouse, oversized sweatshirt, and stretch performance top may require different grading approaches.
When Should Grading Rules Be Finalized?
Provisional grading rules can be considered during early development, particularly when the intended size range and design requirements are known.
However, final size specifications should reflect the approved fit direction and relevant base-pattern development.
If the base-size fit changes, the grading rules may need review.
For complex products, size-set samples can help verify whether the graded dimensions produce suitable fit and proportions across the intended range.
Video: Building a Graded Specification Sheet
The following tutorial, Tech pack tutorial on apparel grading sheet by Techpacker, demonstrates how grading rules can be added to a technical specification and used to generate measurements across garment sizes. It provides a practical visual explanation of how base-size measurements and grade increments work together.
QA Measurement and Sample Fit Assessment
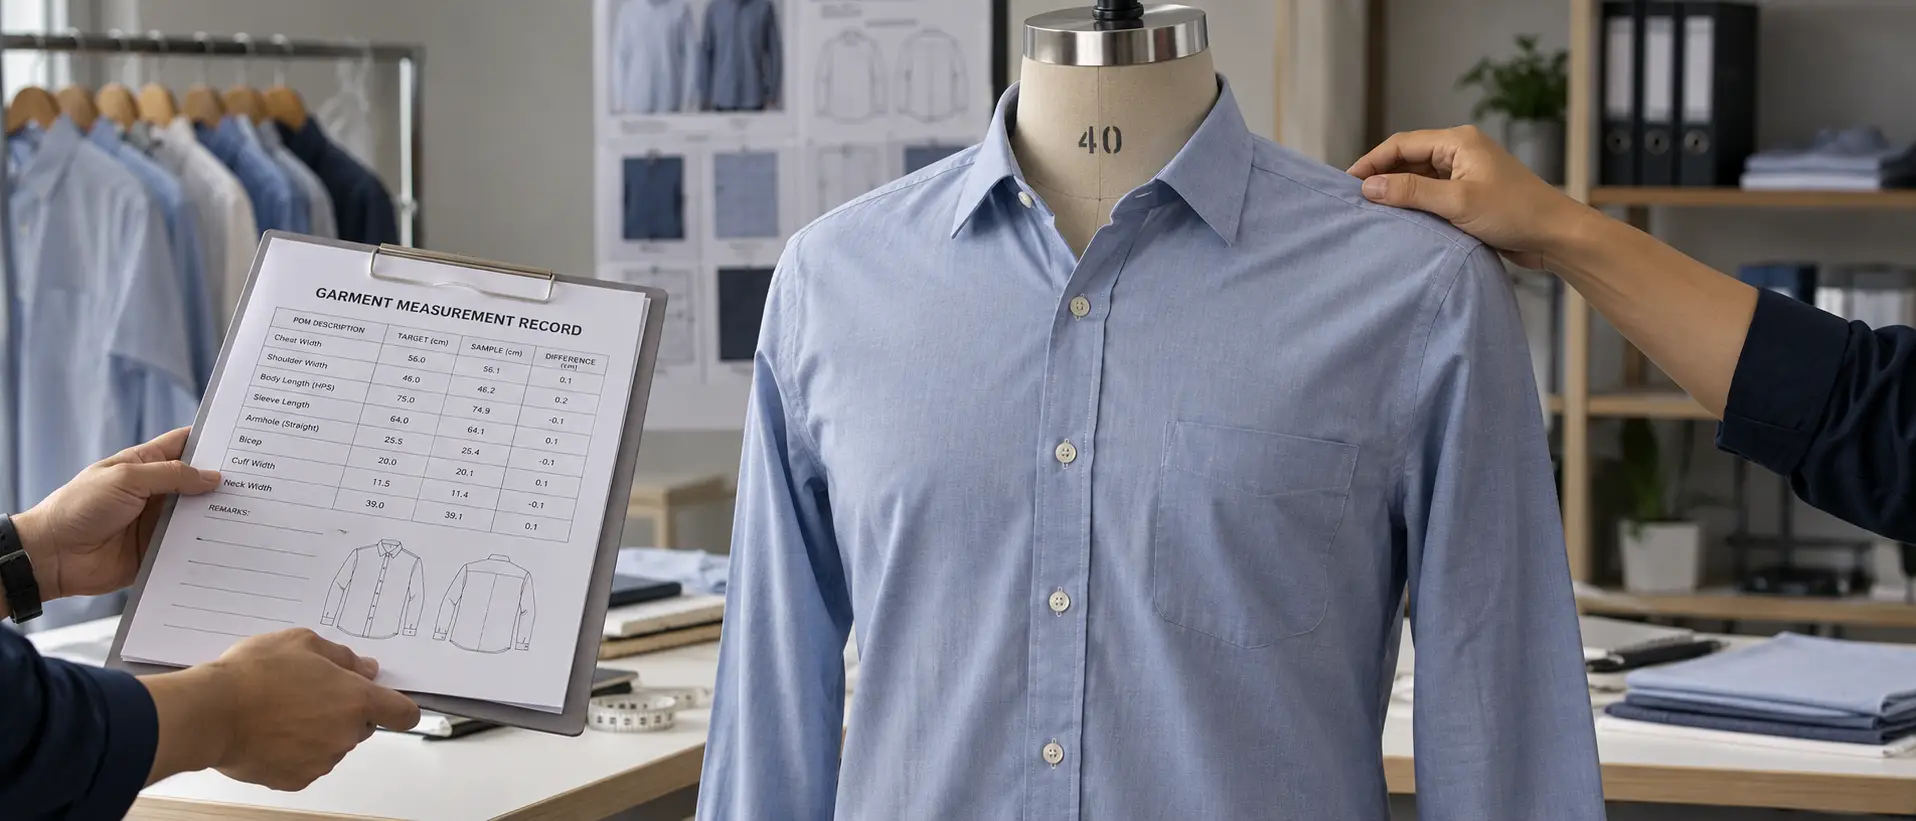
Quality assurance measurement checks whether garment dimensions meet the applicable technical specifications.
Sample fit assessment evaluates how the garment looks, feels, and performs when worn or fitted on an appropriate form.
These activities support each other, but neither replaces the other.
Measurement Compliance vs. Fit Approval
A garment may have acceptable chest, shoulder, and sleeve measurements but still show poor balance, twisting, pulling, or an unsuitable silhouette.
Conversely, a sample may appear visually acceptable while one or more measured dimensions fall outside agreed limits.
A complete sample assessment should therefore consider:
Measurement compliance: Whether the relevant POM results meet their specified dimensional limits.
Physical fit: Whether the garment meets the intended shape, balance, comfort, and wearability requirements.
Construction and workmanship: Whether sewing methods, finishing, and relevant technical details meet the approved specifications.
The final decision should follow the applicable sample stage and buyer approval requirements.
QA Measurement Checklist
| Inspection Check | Evidence | Evaluation Criteria | Responsible Party |
|---|---|---|---|
| Correct Style and Size | Style and size identification | Matches inspection request | Manufacturer QC |
| Correct Specification | Document revision | Current approved reference used | Development / QA |
| Garment Condition | Measurement preparation record | Matches approved method | Measuring Team |
| POM Measurements | Completed measurement sheet | Compared with target and tolerance | Technical / QC |
| Critical Deviations | Measurement findings and supporting evidence | Evaluated under agreed criteria | Authorized Reviewer |
| Fit Assessment | Fit comments and relevant photographs | Meets intended fit direction | Buyer / Technical Team |
| Corrective Actions | Updated comments and records | Required corrections completed | Manufacturer / Technical Team |
| Approval Record | Signed or otherwise authorized decision | Correct sample and specification identified | Authorized Approver |
How Many Garments Should QA Measure?
The number of garments measured depends on the inspection purpose.
A development sample may require detailed measurement of the individual garment being assessed.
A size-set review may require checks across the intended size range.
Bulk-production inspections may use a defined sampling plan, specific POM priorities, or additional measurement requirements established by the buyer.
There is no single garment count that applies to every situation.
The measurement sampling plan and acceptance procedure should be agreed in advance.
Documenting Measurement Evidence
For an out-of-tolerance measurement, record:
- Relevant POM code
- Garment size and reference
- Target measurement
- Applicable tolerance
- Actual result
- Calculated deviation
- Measuring method used
- Document version
- Required follow-up or decision
Photographs can be useful where measuring technique or reference-point positioning is disputed.
The measurement record should preserve the actual result rather than replacing it with a subjective description.
Connecting QA Checks With Sample Approval
Measurement reviews should be coordinated with the appropriate sample-development milestones.
Depending on the garment, these may include prototype, fit sample, size set, and pre-production sample reviews.
The specific sample sequence can vary by product and buyer requirements.
A coordinated sample management and approval process helps buyers connect measurement findings, technical corrections, fit reviews, and approval decisions with the correct sample and specification version.
How to Resolve Garment Measurement Disputes With a Manufacturer
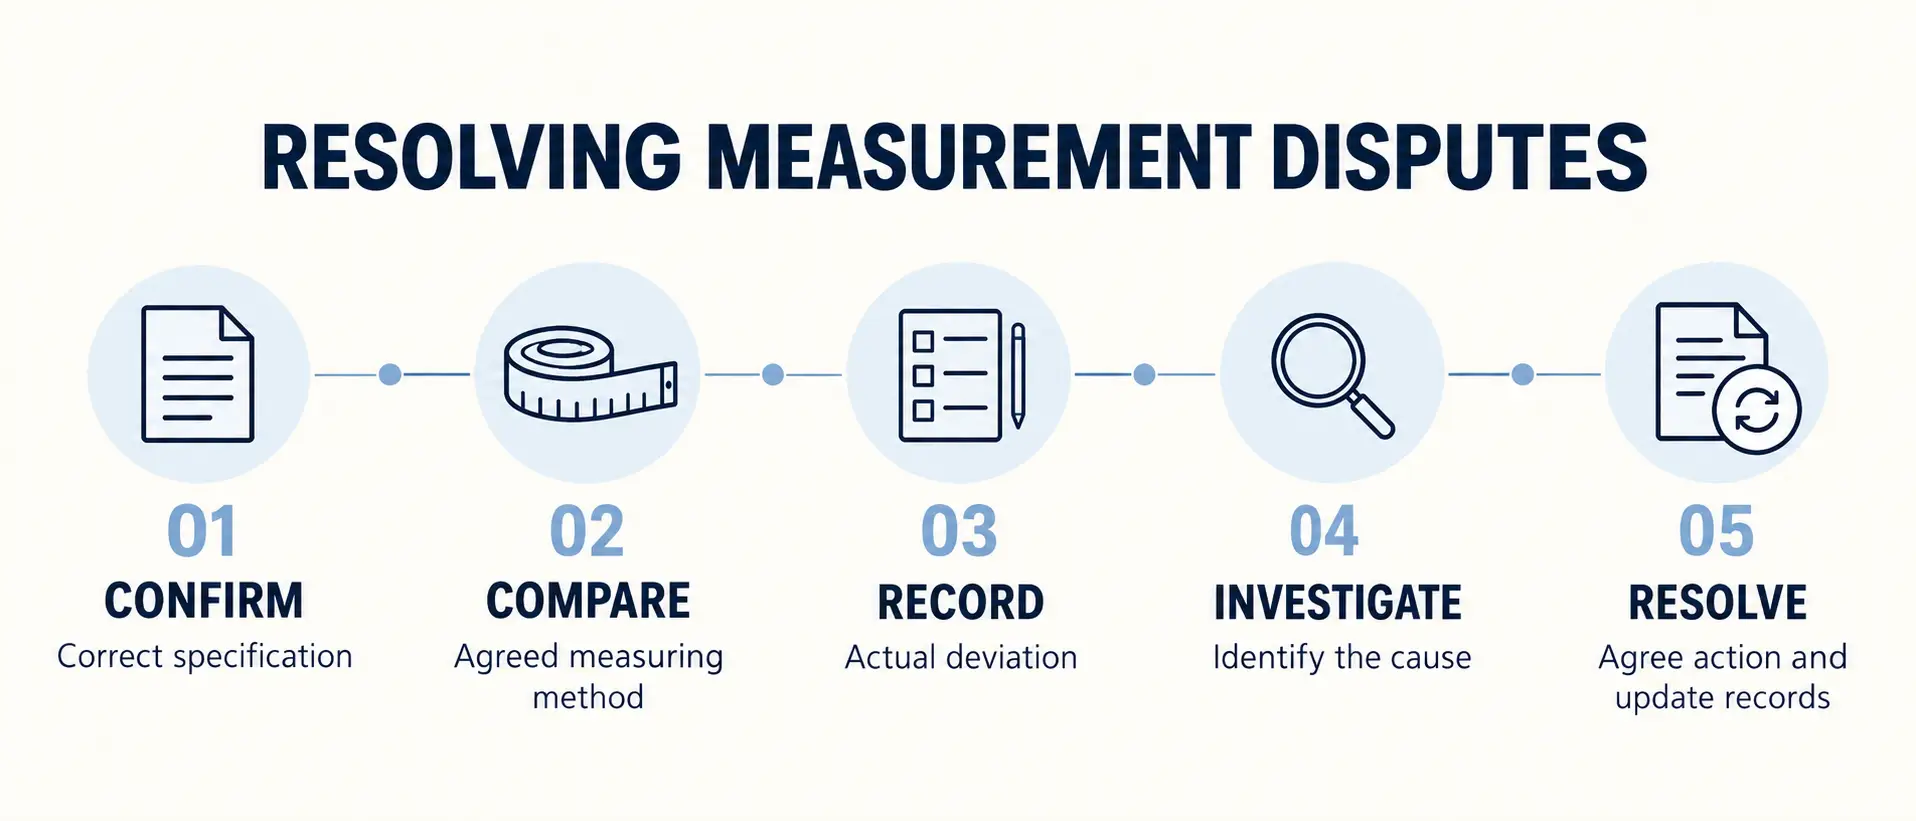
Even with detailed technical specifications, disagreements can occur during sampling or production.
The most effective response is to investigate the actual reason for the difference rather than immediately assuming that one team measured incorrectly.
A practical resolution process can be completed in six steps.
Step 1: Confirm the Technical Reference
Verify that both parties are using the same style, size, specification version, and applicable measurement conditions.
An outdated chart can create disagreement even when both teams perform their measurements correctly.
Step 2: Compare the Measuring Methods
Review the POM definitions, tape positions, garment state, and reference points.
If necessary, request photographs or a controlled remeasurement showing how the dimension was taken.
Step 3: Record the Actual Deviation
Compare the result with the approved target and tolerance.
Document the difference numerically and identify whether it falls within or outside the applicable limits.
Step 4: Investigate the Cause
Possible causes include:
- Incorrect measuring method
- Pattern or grading error
- Sewing or construction variation
- Fabric shrinkage or relaxation
- Finishing-process variation
- Incorrect specification revision
The appropriate corrective action depends on the underlying cause.
Step 5: Agree on the Required Correction
The technical team should confirm whether the garment requires remeasurement, pattern changes, manufacturing adjustments, further testing, or another agreed action.
A dimensional correction should also consider possible effects on the garment’s overall fit and appearance.
Step 6: Update and Confirm the Record
If the approved technical requirements change, update the specification and record the revision.
If the original specification remains unchanged, record the measurement finding and required corrective action without unnecessarily changing the target.
This distinction prevents a manufacturing deviation from becoming an undocumented change to the buyer’s product standard.
Avoid Changing Specifications Simply to Pass a Sample
A manufacturer may propose changing an agreed measurement target or tolerance when a sample repeatedly falls outside the required range.
Such proposals should be technically evaluated.
A specification change may be appropriate if the original requirement proves unsuitable or the buyer deliberately changes the fit direction.
However, tolerances should not be widened merely to conceal inconsistent manufacturing results.
Clearer Communication Reduces Repeated Fit Disputes
For brands working with multiple suppliers or manufacturing locations, consistent technical documentation makes it easier to communicate requirements and compare development results.
At RYZEAL SOURCING, apparel development and manufacturing activities can be coordinated through a vetted network of specialized manufacturing partners in Bangladesh.
Clear measurement specifications, sample comments, and approved technical references help buyers communicate their intended fit while development and production requirements are reviewed with suitable manufacturing partners.
Ready to Develop and Evaluate Your Clothing Samples?
Share your garment design, measurement specifications, existing tech pack, or sample requirements with RYZEAL SOURCING to discuss fit development and sampling through suitable apparel manufacturing partners in Bangladesh.
Frequently Asked Questions About Garment Measurement Tolerance
What is garment measurement tolerance?
Garment measurement tolerance is the permitted deviation from an agreed target garment dimension. For example, a 52 cm chest-width target with a tolerance of ±1 cm allows a specified measurement range of 51 to 53 cm.
How do you calculate garment measurement tolerance?
Subtract the permitted negative deviation from the target to obtain the lower limit, and add the permitted positive deviation to obtain the upper limit. The tolerance value itself should be established according to the garment’s fit requirements, fabric behavior, construction, and buyer specifications.
What are Points of Measure (POM) in apparel?
Points of Measure are defined garment dimensions used for technical specifications and inspection. Each POM should include a clear measuring location and method so results can be compared consistently.
How do you measure a garment correctly?
Prepare the garment in the specified condition, identify the correct reference points, position the measuring tape according to the approved method, and record the result using consistent units and precision.
Are garment measurement tolerances the same for every fabric?
No. Different fabrics, construction methods, and garment designs may require different tolerances. Values should be technically reviewed and agreed rather than applied universally.
What is the difference between shrinkage allowance and measurement tolerance?
Shrinkage allowance accounts for expected dimensional change caused by a defined process, such as washing or finishing. Measurement tolerance defines the acceptable variation around a target at an agreed measurement stage.
Can a garment pass its measurements but fail a fit assessment?
Yes. A garment may meet its listed measurement limits while showing poor balance, discomfort, twisting, or an unsatisfactory silhouette. Dimensional compliance and physical fit must be evaluated together.
What should a garment measurement specification sheet include?
It should include style identification, size range, POM definitions, target measurements, tolerances, how-to-measure instructions, applicable garment conditions, and revision information.
How do grading rules affect garment measurement tolerances?
Grading rules determine target measurements for different garment sizes. Tolerances define the permitted variation around those targets. They are separate technical requirements.
What should happen when a garment measurement is outside tolerance?
The deviation should be recorded, the measuring method verified, and the finding evaluated under the relevant buyer requirements and inspection procedure. Appropriate correction or disposition should then be confirmed.
Do clothing manufacturers use one standard tolerance chart?
Not necessarily. Brands and manufacturers may have different tolerance policies according to garment category, customer requirements, material behavior, and manufacturing capability. The applicable chart should be agreed for the product.
How can clothing brands prevent measurement disputes?
Use consistent POM definitions, clear measuring instructions, agreed tolerances, controlled specifications, documented measurement results, and a structured process for reviewing corrections and approvals.
Final Takeaway: Garment Measurement Tolerance Requires a Shared Standard
A reliable garment measurement tolerance system is not simply a chart of dimensions with plus-or-minus values.
It is a coordinated method for defining garment measurements, explaining how those measurements must be taken, establishing appropriate acceptance limits, and recording results consistently.
For clothing brands, this provides a clearer basis for evaluating samples and maintaining intended fit standards.
For manufacturing teams, it makes technical expectations easier to understand and supports more specific corrective actions.
For quality personnel, it provides measurable references while preserving the distinction between dimensional compliance and overall garment approval.
The essential principles are straightforward: define the measurement, agree on the method, establish suitable tolerances, document the results, and control any approved changes.
When these practices are maintained throughout apparel product development, brands and manufacturing partners have a stronger foundation for preventing avoidable fit disputes and keeping garment specifications consistent from sampling through production.
Connect with RYZEAL SOURCING